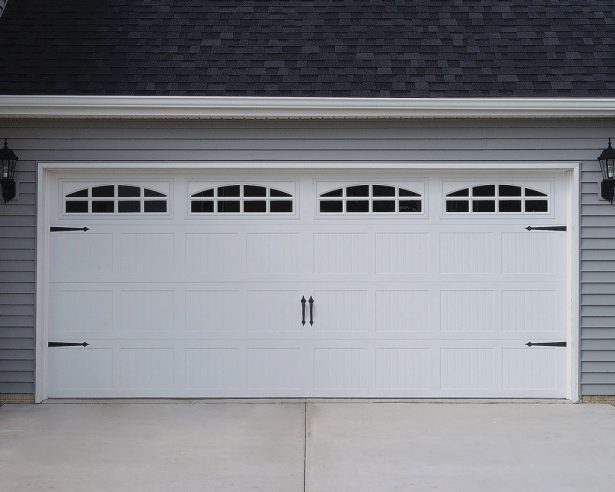
How to Clean and Paint a Metal Garage Door
A freshly painted metal garage door can change the appearance of an entire home, especially when the door faces the street. Cleaning removes chalky oxidation, road dust, cobwebs and salt deposits, while a suitable coating helps protect the panels from corrosion and Australia’s strong sunlight.
The job is manageable for many homeowners, but preparation determines the result. Steel, galvanised metal and aluminium need slightly different treatment, and the right products matter in coastal suburbs, dry inland areas and places exposed to intense afternoon heat. Plan the work for a mild, dry day and allow enough time for each coat to cure properly.
Assess The Door And Gather Materials
Start by identifying the door’s surface and checking its condition. A magnet will usually cling to steel but not aluminium. Look for rust around fasteners, panel edges and the bottom rail, where wet leaves and driveway spray often collect. Light surface rust can usually be cleaned and treated, but deeply pitted sections or loose metal may need professional attention.
Inspect the hinges, rollers, weather seals and lifting cables without dismantling any spring or counterbalance components. If the door is connected to an automatic opener, disconnect its power before cleaning and painting. Raise the door only when necessary, and keep fingers away from panel joins and moving hardware.
Gather the following items before starting:
- A bucket, soft brush, sponge and garden hose with a gentle spray setting
- Sugar soap or a mild exterior detergent, plus clean water
- Sandpaper, a sanding block and a wire brush for small rust patches
- Metal primer and exterior acrylic or enamel made for the door’s surface
- Drop sheets, painter’s tape, gloves, eye protection and a sturdy step ladder
Choose a shaded work area where dust will not settle on wet paint. If you are recording the process in a digital maintenance checklist, a brief guide to asyncio programming may help with organising automated reminders, although the physical preparation itself should remain simple and methodical.
Clean And Prepare The Surface
Begin with a dry brush or broom to remove loose dirt, spider webs and flakes of old paint. Wash from the top down using warm water and a small amount of sugar soap. A soft brush is useful for textured panels, while a non-abrasive sponge is safer for smooth Colorbond-style finishes. Rinse thoroughly so detergent residue does not interfere with adhesion.
Avoid blasting seals, bearings and electrical components with a pressure washer. Excessive pressure can force water behind trims or damage weather strips. In Sydney, Wollongong and other coastal areas, pay particular attention to white salt film that can remain after sea air or storm conditions. Rinse twice if necessary, then allow the door to dry completely.
Once dry, scrape away peeling paint and feather the edges with medium-grit sandpaper. Use a wire brush only on rusty spots, followed by fine sanding to smooth the transition between bare metal and sound paint. Remove the sanding dust with a clean, slightly damp cloth and let the surface dry again.
Treat exposed steel with a rust-converting or rust-inhibiting product compatible with the primer. Do not paint over bubbling corrosion, grease or chalky residue. Aluminium commonly needs light abrasion and a suitable etch or bonding primer rather than a general-purpose rust primer.
Select Paint For Australian Conditions
Exterior metal paint must tolerate ultraviolet exposure, temperature changes and occasional heavy rain. On the Australian market, products labelled for exterior metal, galvanised steel or aluminium are generally a better choice than interior enamel. A water-based acrylic is easier to clean up and often dries quickly, while an oil-based enamel can provide a harder film but may require longer drying times and compatible solvents.
Primer selection is important. New or exposed galvanised metal can reject ordinary paint because of its smooth, treated surface. Use a galvanised-metal primer or bonding primer specified by the manufacturer. Bare aluminium also benefits from an appropriate etch primer. If the existing coating is sound and lightly scuffed, a compatible direct-to-metal system may be sufficient.
| Door Surface | Preparation | Recommended Coating | Important Detail |
|---|---|---|---|
| Painted steel | Wash, scrape and sand | Exterior metal primer plus acrylic or enamel | Treat rust before priming |
| Galvanised steel | Degrease and lightly abrade | Galvanised-metal or bonding primer | Avoid painting over white oxidation |
| Aluminium | Clean and sand lightly | Aluminium-compatible etch or bonding primer | Do not use aggressive wire brushing |
| Previously coated panels | Remove loose paint and dull the sheen | Compatible exterior topcoat | Test a small hidden area first |
Colour also affects performance. Dark charcoal and black finishes can become extremely hot in full sun, increasing expansion and making some doors harder to operate. Pale grey, cream and light beige generally reflect more heat. If matching the house trim, check a sample outdoors because Australian sunlight can make colours appear very different from a hardware-store display.
Apply Primer And Paint Evenly
Mask handles, windows, rubber seals, tracks and nearby brickwork before opening the primer. If the door has removable decorative inserts, take them off only if they can be safely refitted. Protect the driveway with drop sheets, but keep the sheets secured so wind does not blow dust onto the wet finish.
Stir the primer rather than shaking it, which can introduce bubbles. Use a quality synthetic brush for edges and a short-nap roller for broad flat panels. Spray application can produce a very smooth finish, but overspray is difficult to control around neighbouring homes, vehicles and garden beds. Follow the product’s stated coverage and recoat time instead of relying on a surface that merely feels dry.
Apply a thin, even primer coat, paying attention to panel joins, folded edges and screw heads. Heavy application can sag on vertical sections and may remain soft underneath. After the primer cures, lightly sand any raised fibres or rough particles and remove the dust before applying the topcoat.
Two light topcoats usually provide better coverage and durability than one thick coat. Work systematically from the top panel down, keeping a wet edge to reduce lap marks. On sectional doors, paint each panel without flooding the hinge areas. Leave the door in the manufacturer’s recommended position while each coat dries, and never force painted panels together when the coating is still tacky.
Manage Drying And Reassembly Carefully
Weather conditions affect the finish as much as the product. Avoid painting during rain, heavy dew, strong wind or extreme heat. In Brisbane and northern New South Wales, humid conditions can slow curing even when the surface appears dry. In Perth or inland South Australia, hot, dry wind can cause paint to skin over before it levels. A mild day with stable conditions is usually safest.
Keep pets, children and vehicles away from the work area until the coating has cured. Do not close a sectional door if wet paint could stick along the panel seals or overlap. Check the label for the full cure period, which is different from the time stated for recoating.
Before reconnecting the opener, inspect the rollers, hinges and seals for drips or paint build-up. Remove painter’s tape carefully while the finish is slightly firm rather than leaving it until it bonds hard. Reconnect the power only after the work area is clear and all components are dry.
Use these checks before returning the door to normal operation:
- Confirm that no paint has entered the tracks or collected on rollers
- Make sure the door opens and closes without rubbing or binding
- Check that weather seals remain flexible and properly seated
- Test the automatic opener’s safety reversal with a suitable object
- Stop immediately if cables, springs or lifting hardware look damaged
The safety-reversal test should follow the opener manufacturer’s instructions. Never adjust spring tension or remove cable drums as part of a painting project. Those components store significant force and require a trained garage door technician.
Maintain The Finish And Arrange Repairs
Wash the painted surface every few months with mild detergent and fresh water, particularly if the home is near the coast. Salt and airborne pollutants can gradually dull the coating and encourage corrosion at fasteners. Homes in Melbourne may need extra attention after wet winters, while properties in dusty regional areas benefit from gentle rinsing before grit is rubbed into the finish.
Touch up chips as soon as they appear. Sand the damaged spot, remove any rust, apply primer where bare metal is visible and blend the topcoat into the surrounding area. Avoid painting over drainage holes, moving joints or the flexible sections of weather seals. Lubricate suitable hinges and rollers with the product recommended by the door manufacturer, keeping oil away from tracks and painted surfaces.
A repair is more appropriate than repainting when panels are bent, rust has perforated the metal, the door drops suddenly or the opener strains repeatedly. Local conditions and replacement-part availability vary, so homeowners seeking garage door repair help can use a specialist resource before deciding whether the issue is cosmetic or mechanical.
Arrange a professional inspection if the door is uneven, the cables are frayed, the springs are noisy or the opener fails its safety test. In Australia, a qualified local technician can also advise whether the existing door, coating system and automatic opener meet current installation and safety expectations.
Clean the door thoroughly, select a coating suited to its metal and climate, and allow every layer to cure fully. With careful preparation and routine washing, a painted garage door can retain its colour and protection for years. Set aside a dry weekend, gather the correct primer and exterior paint, and repair any mechanical fault before beginning the cosmetic work.