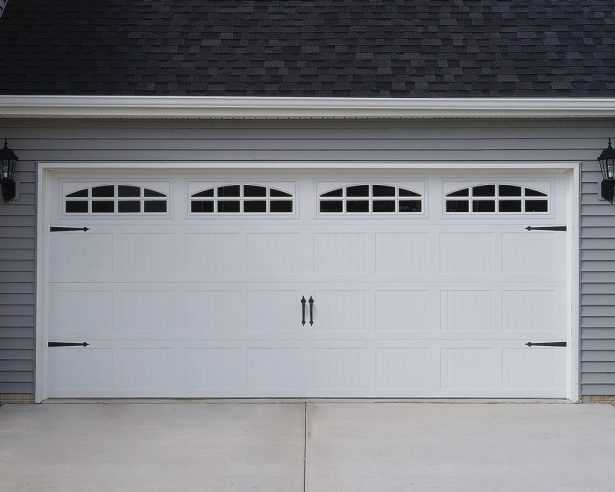
How to install a garage door insulation kit
Installing a garage door insulation kit can make an Australian garage noticeably more comfortable in summer and winter while reducing dust, noise and draughts. It is especially useful for sectional steel doors in Perth and Adelaide, where summer heat builds quickly, and for homes in Hobart, Melbourne and Tasmania, where a cool garage can become uncomfortably damp. A well-fitted kit can also protect stored tools and belongings from temperature swings.
This guide focuses on insulated panels or foil-backed insulation fitted inside a sectional garage door. It does not cover roller doors, which need a different approach. Before starting, check that the door is straight, the opener and tracks work correctly, and the manufacturer allows insulation. The job is mostly careful measuring and clipping, but working around springs, cables and moving panels demands patience and the correct safety setup.
Choose an insulation kit that suits the door
First, identify the door’s type and construction. Most insulated kits fit between the ribs of a steel sectional door, while some are made for aluminium or fibreglass sections. A timber door needs an approved blanket or panel system rather than rigid inserts. Check the kit’s thickness against the gap between the inner and outer skins; packing it too tightly can bow the door or restrict the opener. Keep glass, louvre and vent sections clear unless the instructions specifically allow covering them.
Australian homes often use Colorbond-steel or colour-matched steel garage doors, and replacement sections are commonly sold by profile and width. Measure every leaf of a double garage separately, even when the doors look identical, because a small mismatch changes the clip positions. Decorative ribs, raised panels and window frames also affect the fitting method. If the existing cladding is rusty or distorted, repair that first; insulation cannot correct a structural problem.
A typical kit may contain rigid polystyrene sheets, foil-faced bubble insulation, retaining clips, adhesive or screws, and foil tape. Choose the material that suits the panel bay and local conditions. Reflective foil is useful in hot, bright climates, while rigid foam can provide a tidier fit and greater resistance to handling. Australian sun, dust and condensation are hard on exposed edges, so select a product intended for garage use and keep any adhesive or facing clear of the door’s moving hardware.
Measure the door and make the area safe
Work on a dry, still day and clear the tracks, floor and ceiling space. Park the vehicle outside the garage. Lower the sectional door fully, disconnect the opener at the wall button or receiver, and put the wall control into manual mode if that is how your model operates. Never rely on the emergency release to support the door. If the headroom is low, use a properly rated ladder and make sure the door cannot move while you fit insulation above it.
Record the overall width and height in millimetres, then measure each individual panel bay between the steel ribs. Note the location of windows, handles, horizontal braces, rollers and hinges, and check whether the kit instructions call for starting at the top or bottom. Australian suppliers often list sectional doors by leaf width rather than the total opening, so use those figures to select the kit. If the door has more than one leaf, label each bay with masking tape before removing anything.
Inspect the bottom bracket, drums, cables and centre bracket. If a cable looks frayed, a drum is damaged or the door will not hold its weight, stop and use the cable replacement guide to understand the tension-sensitive parts. Torsion-spring and counterbalance work is not a normal part of installing insulation, and an experienced technician should handle it if you are unsure. Do not release cable tension or add spring turns simply because you are adding insulation weight.
Fit the insulation inside the panels
Clean the inside face of the door and remove dust, oil and loose paint. Where the manufacturer permits it, remove the internal stop moulding that retains the panels. Keep the weather seal at the bottom in place unless the kit instructions say otherwise. Use painter’s tape to mark each bay, and make a cardboard template of an unusual section around a window or raised panel. A template transfers the shape accurately without forcing the insulation into a curved recess.
Cut every piece on a flat surface with a sharp craft knife and straightedge. Follow the template rather than freehand, and make only the trimming allowance stated in the kit instructions. Score the facing rather than crushing it, especially if the insulation is foil-backed bubble wrap. For rigid foam, support the entire cut panel while carrying it to the door. Narrow offcuts can provide useful test pieces for a tight corner, but never use an offcut to fill a large gap because an unsupported section can fall out when the door moves.
Fit the insulation so it sits flat between the ribs and does not bulge around the ribs or push against the outside skin. Follow the kit’s sequence; many clip-on systems work from the top down, while others are designed to be built upward from the bottom bracket. Place the insulation’s facing in the direction specified by the manufacturer. Press retaining clips over the edges at every rib, spacing them as shown in the instructions. If adhesive clips are used, clean the steel with the recommended cleaner first and allow the full stated curing time before operating the door.
Leave clearance around hinges, roller brackets, the bottom bracket and any lifting hardware. Never drill through the outer skin unless the door and kit manufacturers explicitly approve it, as that can admit water and weaken the panel. Do not cover a raised panel’s locking point or obstruct a service latch. Replace each stop moulding and check that every clip sits squarely over the insulation. A small amount of foil tape can close a cut edge, but do not tape over a clip or trap moisture inside the bay.
Seal the edges and test the operation
Insulation works best when moving air cannot bypass it. Check the existing bottom sweep, side jamb seals and header seal for gaps, tears or hardened rubber. Replace compressed or brittle seals with products matched to the door’s profile and opening size. A brush-type seal may reduce dust around the sides, while a proper bottom sweep closes the gap left when the door is shut. These seals are separate from the insulation panels but are an important part of a comfortable, draught-free garage.
Once the counterbalance has been confirmed as sound, and only if the door balances normally, raise and lower it manually while watching the panel edges and rollers. The insulation should stay put, and the door should move without scraping or rubbing. Lower it again, reconnect the opener and use the remote to complete several full cycles. Listen for changes in motor noise and watch from the side rather than standing beneath the moving panels. If the door binds, reverses or leaves a gap, disconnect it again and correct the loose clip or oversized cut before another test.
Warm, humid conditions can reveal problems that a quick daytime test misses. Look for condensation along the bottom edge and check that ventilation openings are not blocked. A faint warm patch is normal, but a hollow, moving section suggests the insulation is loose. Excess noise may come from foil touching the steel as the door flexes; trim or reposition it rather than tightening the door. Save the manufacturer’s instructions, record the insulation product and bay dimensions, and keep a spare pack of clips for future adjustments.
Complete the installation and plan maintenance
Give the finished installation a final visual check from inside the garage. Neatly trim any exposed edges, replace damaged facing and keep the lower section clear so grit cannot work into the clips. Many Australian garages double as workshops, storage rooms or weekend project spaces, so improve access by routing cables away from the insulation and labelling the opener’s emergency-release cord. Do not lean stored bicycles, chemicals or shelving against the door, because pressure can dislodge insulation even when the panels themselves look fine.
Inspect the installation every few months and after strong winds or storms. Check that the retainer clips are secure, the bottom sweep still contacts the threshold and the insulation has not shifted. Clean the inside face with a soft brush or vacuum rather than a pressure washer, which can force water behind the cladding. A little music makes methodical checks easier; a love song collection can provide background listening while you organise the workbench and keep the area clear.
Choose the correct kit, download the manufacturer’s installation guide and confirm that it matches your door’s material, profile and panel widths before ordering. Measure one leaf and one complete panel bay in millimetres, then photograph the existing hardware and label the clips so the work can be reversed later. With the right parts, a clean work area and a careful safety check, you can complete the job in a weekend.