How to Pair a Chamberlain Garage Door Opener With a New Car
Pairing a Chamberlain garage door opener with a new car usually takes only a few minutes. The process uses the vehicle’s built-in garage buttons, often found in the overhead console, rear-view mirror, or sun visor. You will generally need the existing handheld remote and access to the opener motor mounted on the garage ceiling.
Australian vehicles and openers can differ by model, radio frequency, and compatibility. A Chamberlain unit sold in Australia may use a rolling-code system, while a car imported from the United States may use a different HomeLink frequency or require a compatibility bridge. Checking these details before programming avoids wasted time and prevents unnecessary resetting of working remotes.
| Setup situation | What you usually need | Typical programming method |
|---|---|---|
| New car, existing Chamberlain remote | Handheld remote and opener motor | Train the car button with the remote, then press the opener’s Learn button |
| New car and no working remote | Compatible car system and opener manual | Use the opener’s Learn button and vehicle instructions together |
| Older Chamberlain opener | Remote with matching frequency | Pair the remote first, then synchronise the vehicle |
| Imported car or unusual frequency | HomeLink compatibility information or bridge | Confirm frequency support before attempting setup |
| Multiple garage doors | A separate car button for each opener | Repeat the process for every door and remote channel |
Check Compatibility Before Starting
First, confirm that the new car has a built-in garage door transmitter. Common labels include HomeLink, Garage Door, or a small icon showing a house. Some newer cars place the controls in the infotainment system rather than using three physical buttons. Consult the vehicle handbook to find the correct controls and learn whether the system supports Chamberlain rolling-code openers.
Look at the Chamberlain motor unit, remote, and opener label for model information. Australian Chamberlain products commonly operate on frequencies used in the local market, while imported vehicles can have regional restrictions. If your car came from overseas, check its HomeLink frequency range before programming. A compatibility bridge may be needed if the vehicle and opener communicate on different frequencies.
Take a moment to consider the surrounding garage as well. Reliable lighting makes the Learn button easier to locate, especially in a dark carport or enclosed garage. A well-planned garage lighting setup can improve visibility during programming and routine maintenance without changing the opener itself.
Prepare the Opener and Vehicle
Park the car outside the garage but close enough for the handheld remote to reach the opener. Keep the garage door closed while you work. Set the vehicle ignition to accessory mode or start the engine according to the car manufacturer’s instructions. Avoid leaving the engine running inside an enclosed garage because carbon monoxide can build up quickly.
Clear people, pets, bicycles, and stored items from the door’s travel path. Programming normally does not require the door to move until the final test, but an accidental button press could activate it. Keep the original remote in your hand, and make sure its battery is fresh. A weak battery can make the learning process appear to fail.
Find the opener motor on the ceiling and identify the coloured Learn or Program button. Depending on the generation, it may be yellow, purple, red, orange, or another colour. The button is commonly beside the antenna wire or under a light cover. Do not remove electrical covers or work on the mains wiring; the programming controls are designed to be accessed from outside the motor housing.
Teach the Car the Remote Signal
Begin by holding the handheld Chamberlain remote approximately 2 to 5 centimetres from the car’s selected garage button. Press and hold the remote button and the chosen car button at the same time. Continue until the vehicle’s indicator changes from a slow flash to a rapid flash, or until the car display confirms that the button has been trained.
The exact timing differs between vehicles. Some cars require releasing and pressing the car button several times, while others ask you to hold both buttons until the indicator changes. This first stage copies the remote’s signal into the car; it usually does not yet complete the rolling-code connection with the ceiling-mounted opener.
Useful checks during remote training
- Use one car button for each garage door rather than overwriting a working channel.
- Keep the remote close to the vehicle button during the learning stage.
- Replace the remote battery if the vehicle indicator never changes.
- Follow the car handbook if it asks for a specific ignition position.
- Avoid pressing the opener’s Learn button until the vehicle has copied the remote signal.
Once the car accepts the handheld remote, release both buttons. The selected vehicle button now behaves like the remote for older fixed-code systems. For a modern Chamberlain opener, continue with the rolling-code step below.
Complete Rolling-Code Programming
Press and release the Chamberlain opener’s Learn button. Do not hold it down unless the manual specifically instructs you to do so, because holding it for too long can erase every stored remote and keypad code. After pressing Learn, you normally have about 30 seconds to perform the next step.
Return to the car and press the trained garage button for two seconds, release it, and press it again for two seconds. Some vehicle systems or Chamberlain models require a third press. Watch the opener light or listen for a click, which usually indicates that the motor has accepted the new transmitter. The car button should then operate the door.
Test the button while standing clear of the opening. Press it once and wait for the door to begin moving; press it again only if you need to stop or reverse the movement. Test the button from the driveway, then from a normal parking position. If the opener has automatic closing, safety sensors, or a wall console with a lock feature, confirm that these functions still operate normally.
If you have a second garage door, repeat the procedure with another vehicle button and its corresponding Chamberlain remote. This is useful in homes with a double garage, such as properties in Melbourne’s outer suburbs or newer developments around Brisbane where two vehicles may share one garage.
Fix Common Pairing Problems
A car button that flashes but does not open the door usually indicates that the first remote-learning stage succeeded while the rolling-code stage did not. Repeat the Learn-button sequence, keeping the interval short. Make sure you press and release the Learn button rather than holding it, and check that the opener light or indicator confirms learning mode.
If nothing happens, check the opener’s wall control for a lock or vacation setting. This feature can prevent radio remotes from operating the door while still allowing the wall button to work. Also inspect the photoelectric safety sensors near the floor. They will not usually prevent programming, but misaligned or obstructed sensors can stop the door from closing during testing.
Faults worth checking before resetting anything
- The vehicle button was trained to the wrong remote channel.
- The handheld remote battery is flat or intermittently working.
- The car and opener use incompatible regional frequencies.
- The opener Learn button was held long enough to erase stored codes.
- The safety sensors are dirty, blocked, or facing away from each other.
Avoid performing a full memory erase unless you have all remotes and keypads available to reprogram. On many Chamberlain openers, holding the Learn button for several seconds removes existing access codes. That can leave family members, tenants, or a spare vehicle unable to enter until every device is paired again.
Maintain Secure Access Around The Home
After programming, check who still has access to the garage. A vehicle sold privately, a misplaced remote, or an old keypad code can remain active unless it has been erased. If you recently moved into a home in Perth, Adelaide, or the Gold Coast, change inherited keypad codes and remove remotes that belong to previous occupants.
Keep the car’s built-in transmitter protected in the same way as a house key. If the vehicle is stolen, use the opener’s Learn controls or the Chamberlain app, where supported, to remove that car from the system. Never attach a note containing the garage code to the vehicle’s sun visor, registration papers, or key ring.
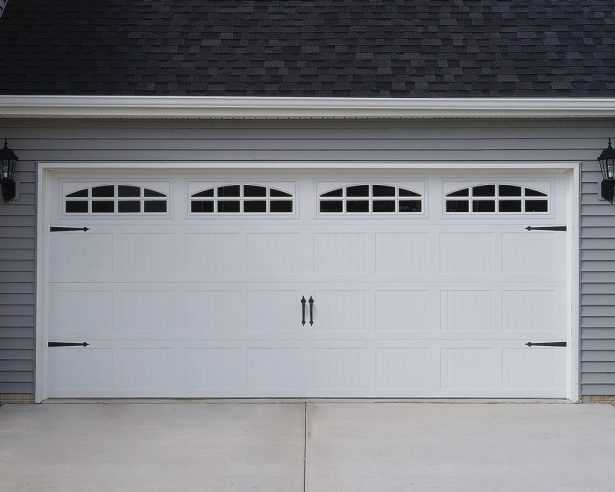
When reviewing the rest of the garage, visual references such as garage door designs can help you compare panel layouts, windows, colours, and access arrangements before a renovation. The right door style should still leave enough clearance for the opener rail, lighting, storage, and safe vehicle movement.
If the car still will not pair after the compatibility and rolling-code checks, contact a qualified garage door technician familiar with Chamberlain products in your area. Local conditions such as coastal corrosion in Newcastle, strong sun in regional Queensland, or voltage and installation issues should be assessed professionally rather than solved by opening the motor housing. Arrange a service visit, provide the opener model and vehicle details, and have the technician program the new car while checking the door’s balance, sensors, and reversing safety.