How to replace a garage door opener drive belt
A garage door opener drive belt carries the trolley that moves the door. When it stretches, cracks, frays or breaks, the opener may hum, stop mid-travel or reverse without an obstruction. Replacing the belt is usually a modest job once the exact opener and its manual have been identified.
Do not confuse a belt-driven opener with a chain or screw drive. The rail may look similar, but the drive parts, tensioning method and safe adjustment differ. A belt that merely looks the right width can also have the wrong tooth profile, pitch or loop length, so visual matching alone is not enough.
Belt drives are common on lightweight sectional doors found in many Australian suburban homes, particularly single and double garages. Local conditions matter: Sydney’s salt and humidity can corrode hardware, Melbourne’s temperature swings affect rubber, Brisbane’s heavy rain washes debris into tracks, and Perth’s heat encourages belt glazing and fraying.
Most successful replacements follow the same sequence: identify the model, isolate and support the door, remove the old belt, fit and tension the new one, then restore limits and test safety reversal. Many households also know the emergency-release routine because grid outages and storm-related power cuts are familiar parts of everyday life.
Identify the opener before touching the belt
Start by finding the model number on the motor housing, rail label or main console. Record every label, especially the brand and suffix; a photograph helps when buying parts. Australian retail catalogues commonly include Merlin, Animatic, Chamberlain and Linear families, and visually similar openers can use different trolleys or belt attachments.
Identify the drive by following the moving member. A toothed flexible loop is a belt drive; linked metal pieces indicate chain; a threaded rod indicates screw drive. On belt units, note whether the belt is continuous or joined with hooks, and whether it clips to the trolley or wraps around it.
Next, obtain the manual for the exact model. It should show belt routing, pulley positions, tension adjustment and limit procedures. If the label has faded, search by dimensions and drive configuration, then confirm the drawing against the physical unit. Never order a belt from an unclear photograph.
Prepare the garage and isolate the opener
Close the door, remove the wall-control power and switch off the appropriate circuit breaker. Treat any exposed wiring as live. Some Australian openers also have a low-voltage battery for emergency use; unplug or disconnect it as the manual directs. Always confirm that the opener is no longer energised before reaching into the rail.
Support the door with a properly rated support at the supplier’s designated point, then pull the emergency-release handle to separate the trolley from the drive. Do not let the door fall. Place tools, a torch and painter’s tape on a dry surface, and keep the motor head and controls away from children and pets.
Fixed-wiring changes belong with a licensed electrician under Australian electrical safety requirements. Do not splice a switch lead or bypass a safety device. Outdoor work also needs attention to local weather: wait for storms to pass in Brisbane, avoid damp conditions in Sydney, and provide shade for exposed components in Perth.
Remove the damaged drive belt
Follow the manual’s release sequence. On many belt drives, slacken the adjustment, remove the trolley from the header bracket and unclip or unhook the belt. If the belt is broken, support the trolley and door before lifting the damaged section free. Do not pry the belt over a pulley.
The idler pulley does not always need removal. If the manual requires it, mark its orientation and position first, then remove the retaining screw or clip. Keep the pulley, sprocket, bracket and bolts together in a labelled container because small changes in pulley alignment can cause tracking and slip.
Inspect what caused the failure. Look for flattened teeth, glazing, torn edges, oil contamination or a stretched span. Turn the pulley by hand and check that the trolley rolls freely. Replace a cracked pulley, bent bracket or damaged trolley rather than fitting a new belt over faulty parts.
Install and tension the new belt
Fit the new belt in the direction shown by the manual, with its teeth engaging the drive sprocket correctly. Secure it to the trolley using the original type of hook, clip or wrap. If using a continuous belt, thread it around the sprocket and idler before seating the trolley; if using joined ends, attach them at the specified point.
Restore the idler pulley and header bracket, then tension the belt with the door closed. Many manuals specify a modest deflection—often around 6 mm at the middle of the span—while others prescribe a marked scale or quarter-turn setting. Use the model instructions rather than tightening until the belt rings like a guitar string.
Check that the belt sits squarely, does not touch the motor cover and turns in the intended direction. Move the trolley by hand along the rail while the door remains supported. If the belt slips, correct routing or tension rather than increasing motor force. A pulley that squeaks or binds needs cleaning, alignment or replacement, not extra tension.
Run safety checks and restore operation
Reconnect the opener and set travel limits only as the manual describes. Limits and force settings are related safety controls; moving a limit can alter where obstruction reversal occurs. If the opener’s memory was lost during a power interruption, restore the remote or keypad according to the manufacturer’s sequence, then confirm the door’s full travel.
Run the door from the wall control and then with the remote while staying clear. Use the manufacturer-approved obstruction test method, keep the test area free of people and pets, and confirm that the door reverses or stops when required. Check photo-sensor alignment if fitted, and reconnect the emergency release so the manual-entry route still works.
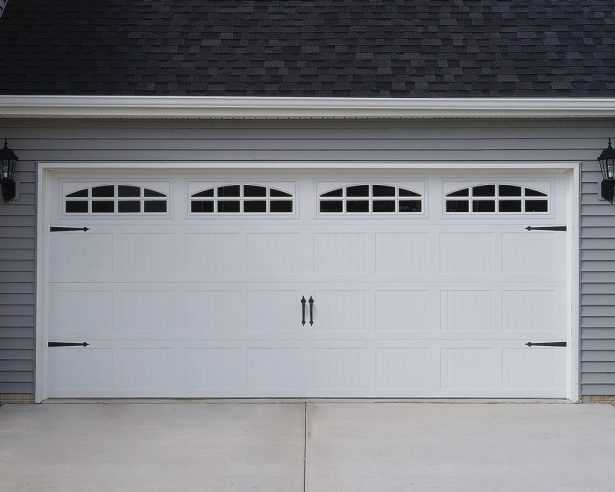
If the motor hums without travel, stop cycling it. Check for a loose belt, an off-rail trolley or a seized pulley. A door that reverses partway can indicate a limit, sensor, tension or real-obstruction issue. For a wider exterior refresh, references on ranch-style garage doors can complement the repair, but appearance must never dictate safety hardware.
Compare drive systems and replacement parts
Match replacement parts across three dimensions: the belt’s width and tooth profile, its finished loop length, and the trolley connection. Stamped codes can narrow the profile, but they may not identify the correct length. A continuous loop and a joined belt are not interchangeable merely because both fit around the pulleys.
Sources must fit the technical question. A pre-match betting strategy, however confidently presented, cannot establish your opener’s belt specification; the manufacturer’s diagram and a reputable supplier’s model cross-reference should do that. Keep the old belt, its packaging and the invoice together for warranty assessment.
In the Australian market, ask for an itemised invoice with GST details and retain the part number. Manufacturer warranties and the Australian Consumer Law may provide remedies for defective goods or services, but they do not make an incorrect part compatible. Record the opener model and replacement date for the next inspection.
| Drive system | Identifying feature | Match before ordering | Frequent warning sign |
|---|---|---|---|
| Belt drive | Flexible toothed loop | Width, tooth profile, loop length and trolley attachment | Fraying, glazing or slipping |
| Chain drive | Linked metal chain | Chain pitch, link count and sprocket type | Rust, elongation or loud operation |
| Screw drive | Threaded rotating rod | Rod diameter, pitch and required lead length | Humming, binding or slow travel |
Use a dependable replacement routine
A consistent routine reduces callbacks and protects the opener’s safety controls. Use the following checklist whenever the belt is changed or inspected.
- Confirm the exact model, manual, drive type, belt code and finished loop length before ordering.
- Isolate power at the control and circuit, then support the door with a properly rated support.
- Replace visibly damaged pulleys, brackets or trolley components during the same repair.
- Set belt tension according to the manual, never by increasing the opener’s force setting.
- Test travel limits, obstruction reversal, photo sensors and the emergency release before normal use.
Replace the failed belt, complete every safety check and restore dependable operation today. If the sprocket, idler, trolley, wiring or limits are damaged, have a qualified garage-door technician or licensed electrician handle the repair rather than masking the fault with extra belt tension.