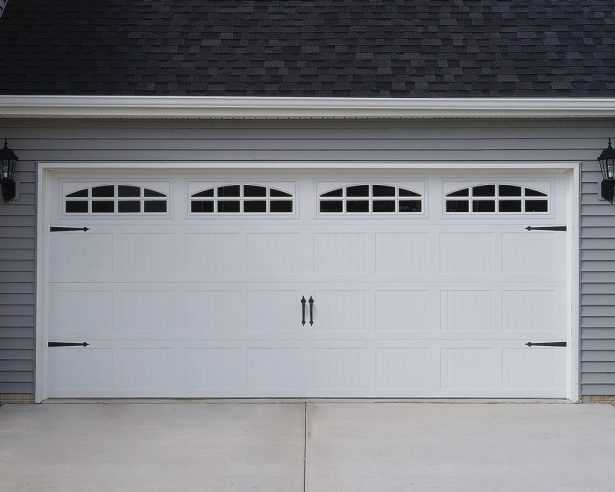
Replacing garage door torsion springs safely
Garage door torsion spring replacement can restore a heavy, uneven or slow-moving sectional door to the balanced operation expected from its opener. It is also one of the most hazardous household jobs because a torsion spring stores enough energy to cause severe injury in a fraction of a second. The work involves more than swapping a coil: spring length, wire size, winding direction, cone position and drum position all affect the counterbalance. Learn more about Repair.
A competent homeowner can understand the procedure, but many should leave the physical work to a qualified garage-door technician. Australian homes in Sydney, Melbourne, Brisbane and Perth commonly use single or double sectional garages, often with compact headroom. Parts are generally specified in metric dimensions, while operators commonly use 240-volt power, making correct preparation especially important. Learn more about Openers.
Know how the torsion system works
A standard residential sectional door uses one or two torsion springs mounted on a steel shaft above the opening. When the opener turns the shaft, the cable drums wind the springs, allowing their stored energy to offset the weight of the door. Cables connect the moving door to the counterbalance system, which is why a balanced door can remain suspended without the motor running.
Before blaming the springs, check the symptoms. A door that slams, will not remain open, strains against the floor or requires extra force often indicates a balance problem. A door that reverses, stops unevenly or changes direction without warning may instead involve rollers, tracks or safety sensors. For electrical symptoms, opener setup guidance can help with programming, force settings and common wall-console controls before mechanical work begins.
Australian installers often use “operator” as well as “opener” and may call the moving panel the door leaf. Those terms are useful when arranging service. Local spring stock may also distinguish left-hand and right-hand winding directions. Use the spring markings and manufacturer’s instructions to determine the correct configuration rather than assuming that a visually similar spring is compatible.
Prepare tools, parts, and a safe workspace
Start with the manufacturer’s manual, the spring identification label and clear photographs of the existing assembly. If the original paperwork is missing, record the visible details before disturbing anything.
Before beginning
- Photograph the cable routing, drum positions, anchor points and centre bracket.
- Record the spring length, wire diameter, cone position, winding direction and number of turns.
- Fit rated door supports and clear a generous work area before raising the panel.
- Keep eye protection, gloves, sturdy footwear, a phone and a torch within reach.
- Move vehicles, bicycles, children and pets well away from the working area.
Have the replacement parts and specialist tools available before removing the old assembly.
Parts and equipment
- A manufacturer-approved matched pair of springs for the door’s weight and drum size.
- Correctly sized winding bars; never use improvised bars or pliers.
- New cables, drum bolts, anchor hardware and replacement brackets where required.
- Replacement safety cables suitable for the door’s track and opening.
- The installation manual, spring label and contact details for a qualified technician.
Check every item against the actual door rather than ordering by colour or appearance. Metric measurements can look interchangeable while still producing the wrong balance. If any spring marking is unreadable, the drum type is unusual or the required part cannot be confirmed, pause before removing the fitted spring.
Isolate the door and release the tension
Switch off the operator at the wall control and isolate its mains supply where this can be done safely. Disconnect the trolley with the emergency release, then position the door as required by the manufacturer, usually closed during spring winding. If the panel must be raised, support it on properly rated stands. Never rely on the door’s weight, the opener or an improvised stack of blocks beneath a raised panel.
Before loosening an anchor, mark the cable and spring positions so they can be restored accurately. Fit the winding bars fully into the drum holes and follow the specified two-person winding method where applicable. Wind the old spring only until its coils become slack, then unhook it from the anchor. Keep faces away from the spring, stay clear of the drum and ensure nobody is standing in line with the winding bars.
A damaged spring can twist, break suddenly or fling fragments across the workspace. Stop if the winding cone will not move, the spring is nicked or the bars do not fit correctly. Safety cables provide a secondary safeguard but cannot support the door, so they never replace stands. If the cause remains uncertain, garage door repair guidance can help distinguish a balance fault from cable, bracket or opener trouble before replacement parts are ordered.
Match the replacement spring correctly
Use a matched pair with the correct wire diameter, overall length, spring pitch, cone type and rated capacity for the door. A spring that is slightly too long or uses the wrong cone may appear to fit while changing the counterbalance. Replace both springs even when only one looks faulty, because an incorrect installation can place unequal loading on the torsion shaft, drums and centre bracket.
Winding direction is equally important. The springs must match the direction in which the drums turn, and left-hand and right-hand types may need to be fitted on opposite sides. Follow the arrows on the spring, the manual and the existing assembly rather than relying on memory. The stationary end belongs at the specified anchor, while the moving end connects to the centre bracket in the position specified for that door design.
Environmental exposure affects the right replacement material. Coastal properties around Sydney, Brisbane and Perth need particular attention to salt corrosion, while hot summers in Melbourne and Adelaide place additional stress on cables, bearings and springs. In designated bushfire-prone areas, replacement work should preserve any required ember-protection features and comply with the door manufacturer’s current safety guidance.
Install and wind the new assembly
Fit the new springs to the torsion shaft in the manufacturer’s designated position without applying preload. Rotate each spring so the cone faces the correct way, secure the stationary anchor and confirm that the moving anchor can attach correctly to the centre bracket. Avoid clamping directly onto the spring coils, and replace any brackets or fasteners that are distorted, cracked or corroded.
With the door closed and properly supported, attach the cables to the drums and begin winding with the correctly sized bars. Follow the manual or the recorded original turns exactly; there is no universal turn count that suits every door. Wind each spring evenly and stop immediately if the bars slip, a cable leaves its drum groove or the assembly begins to move unexpectedly. Keep the work area clear until the spring, shaft and anchors are fully secured.
Set the preliminary tension specified for the door, remove the winding bars and inspect the drums, cables, cones and centre bracket again. A spring can fail violently during this stage, so eye protection and firm control of the bars are essential. Leave the opener disconnected until the door has been manually balanced and the entire torsion assembly has passed a careful inspection.
Test the balance and reconnect the opener
Using a helper, raise the door manually and slowly while keeping the operator disconnected. At approximately halfway, a correctly balanced door should remain open without drifting downward, slamming or rising by itself. If it is too heavy or light, make only the small adjustments permitted in the manufacturer’s instructions, and never exceed the maximum turns stated for the springs.
Before reconnecting the power, check that both cables are seated in the drums, the safety cables are correctly attached, the centre bracket is secure and the anchor bolts are tight. Check the tracks and rollers for binding, and confirm that the spring cones have not moved from their marked positions. Any 240-volt wiring disturbed during the repair should be checked by a licensed electrician, with residual current device protection used where required by the manufacturer or installer.
Reconnect the trolley and test a complete opening and closing cycle. Verify the travel limits, automatic reverse, obstruction sensing and emergency release according to the operator’s manual. If the door behaves differently during testing, disconnect it again rather than compensating with repeated limit or force adjustments. The door should move smoothly and remain stable before normal household use resumes.
Choose the safest level of support
Book a qualified garage-door technician whenever the spring type is uncertain, the door has unusual hardware, the drums or cables are damaged, or the required turns cannot be confirmed. Professional technicians can also identify a broader counterbalance problem that a replacement spring alone will not correct. Provide photographs, the door dimensions, the opener model and a clear description of the symptoms to reduce diagnostic time and avoid an incorrect parts order.
Before the door returns to service, have the final balance test, cable condition, spring tension, anchor security, safety cables and opener settings checked as one system. Protect the household by arranging qualified service before touching an unfamiliar torsion assembly, and keep the operator disconnected until every safety and balance check passes.