Step-by-step guide to programming a Chamberlain garage door opener
Programming a Chamberlain garage door opener is usually straightforward: identify the unit, activate its radio receiver, and register the remote or keypad. Age is the complication. Chamberlain has used Smart Access, rolling-code, DIP-switch and smart-hub systems, so one button sequence will not suit every model.
Match any replacement control to the opener’s model and local radio system rather than treating every purple, yellow or blue learn button alike. Check the model number on the motor housing or rail before buying parts, and keep the owner’s manual nearby.
Programming changes access, not mechanical settings. It will not correct a weak closing force, damaged seal or misaligned safety sensor. Clear children, pets, bicycles and bins from the travel path, then plan an open-and-close test with the door closed and visible.
Australian conditions add useful context. Garage doors often sit beneath compact carports or beside fenced driveways, while weather ranges from Sydney’s salt-laden air to Perth’s heat. Local electrical rules and consumer guarantees also affect repairs and replacements.
Prepare the opener and check compatibility
Start with a visual and mechanical check. Look for a model label on the motor head, the opener’s serial number and the learn button. Note whether the unit has a wired wall console, a Wi-Fi hub or an older radio receiver with DIP switches. Photograph the wiring label before removing any cover, and download the manual for that exact model.
Next, inspect the door itself. A sectional or roller door should move smoothly through its travel, close fully and reverse or stop when an obstruction is detected. Do not adjust limit screws, force settings or safety-sensor alignment as part of remote pairing. If the door stalls, reverses unexpectedly or leaves a gap, diagnose that problem first.
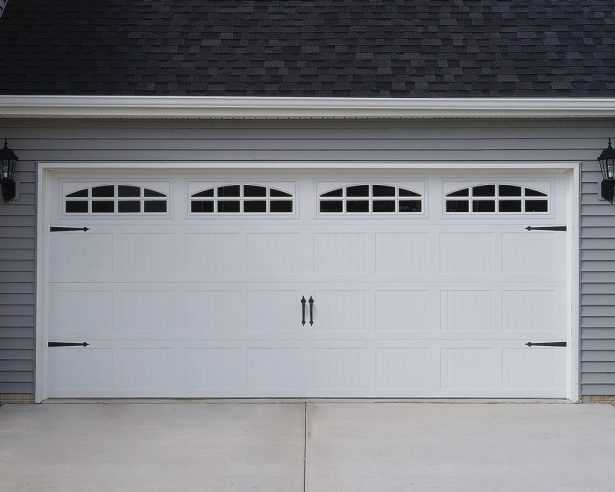
If the opener is being replaced along with the door, compare door design ideas with the opening’s height, width, track space and headroom. A visually suitable panel can still be too heavy or incompatible with the selected drive. Use an authorised Chamberlain supplier to confirm weight, opener force and accessory fit.
Find the correct pairing control
The pairing control is usually marked Learn, Smart Access or Smart Access/Learn. On belt- and chain-driven units it is commonly on the motor head or behind the light lens; on some wall consoles it sits beside the indicator light. Its colour may indicate the control family, but colour alone is not a dependable model guide.
Current Smart Access openers generally use a short press. The indicator flashes and then stays illuminated while the opener waits for a new control. Older units often use a hold-and-release sequence, and very old openers may have a bank of small DIP switches instead. Never assume a coloured button works like the one shown in an online video.
A DIP-switch opener depends on matching the switch positions on the remote to those stored by the opener. Multi-button remotes also need each button assigned to a separate slot. A modern rolling-code remote cannot be made compatible merely by matching visible switches, and a North American control may use a radio system unavailable in the Australian market.
Pair a remote control step by step
Use this sequence for most current Smart Access openers, while treating the model-specific manual as the final authority.
- Confirm that the remote is intended for rolling-code Smart Access pairing and is sold for the opener’s local radio frequency. Check the battery and remove any battery insulating tab.
- Close the garage door. Position yourself beside the wall console, where you can see the opener indicator and remain clear of the moving panel.
- Press and release the Learn/Smart Access button once. Do not hold it. On many models, the LED flashes and then stays lit for up to three seconds.
- Press the large button on the remote once within that window. If the LED goes out before the press, repeat the short-press cycle. Some models require another press while the light remains illuminated.
- Wait for the confirmation pattern, usually a steady light or multiple flashes. On a multi-button remote, pair additional buttons only after the first has worked.
- Test the programmed control with the door closed. Stand to one side, run the opener and check closing, stopping and obstruction sensing before leaving the area.
Many current openers have a second pairing path for older-style remotes: hold Learn until the LED turns off, release it, press it once, then hold the remote button until the LED flashes twice. This sequence varies by production year, so do not combine it with the short-press method unless the manual explicitly calls for it.
Holding a Smart Access button too long can erase previously paired controls rather than add one. If an existing remote still works, note exactly when it stops before attempting a longer reset sequence. That observation helps distinguish a failed remote from a receiver already in pairing mode.
Program a keypad or smart hub
A wireless keypad uses the same radio receiver, but its pairing method can differ. On many current models, press the opener’s learn button once and then press and hold the keypad’s 1 button until its indicator flashes. Other keypads use a Pair control or a printed key combination, so follow the instructions inside the battery cover.
Once paired, enter the desired PIN and test it with the door closed. Where supported, a common PIN-change routine is to enter the existing code, press # or *, add 0 and another # or *, and then enter the new code. Keypads differ, and the factory code should be changed before the keypad enters daily service.
For MyQ or another connected system, pair the hub with the opener first, then add the remote, keypad or app control through the manufacturer’s setup flow. The hub needs a stable home Wi-Fi connection and its own pairing button. If it is online but the opener is unresponsive, check the app’s supported-device list rather than repeatedly clearing the opener’s radio memory.
Clear old codes when necessary
Forgetting every control is rarely the first solution, but it is useful when replacing a lost remote after moving house. On many Smart Access units, press and hold Learn until the indicator goes out; release it; press and release once; then hold it again until the indicator flashes and release. The exact flash pattern matters.
That operation removes existing remote and keypad pairings, so list everything that must be programmed again before starting. It may leave a separately paired MyQ hub connected, while other units require a full power-cycle or factory reset. Consult the manual for the difference between clearing radio controls, resetting the opener and resetting the hub.
Do not pull the emergency release cord to clear a code. It disengages the trolley so the door can be moved by hand, which can be necessary during a power outage but is not a programming command. Once mains power returns, follow the opener’s re-engagement instructions and confirm that the safety sensors respond before testing.
Account for Australian homes and safety
Chamberlain and Craftsman openers are familiar in the Australian market, but imported or garage-sale parts may not match local radio requirements. Many Australian properties use roller or sectional doors in narrow side driveways, with a keypad or wall button close to the house rather than inside the garage. Measure the available space before adding hardware.
Weather changes how remotes and keypads behave. Salt and humidity near Sydney or Brisbane can corrode exposed connections, while Melbourne’s cooler, damper seasons and Perth’s strong UV can age keypads and rubber seals. Inspect batteries and weather seals regularly, shelter exterior controls from direct sun where possible, and replace damaged parts rather than trapping moisture inside the housing.
Mains-powered openers should have properly protected outlets, including residual-current protection where required. Do not alter fixed wiring, replace the power lead or open the motor housing yourself; in Australia, that is work for a licensed electrician. Technicians should also test the safety beams and closing force with the door properly connected.
Keep the invoice, model details and warranty documents. Australian Consumer Law guarantees can apply to defective goods and services, while an authorised dealer is best placed to confirm local parts, radio compatibility and recall requirements. For connected openers, update the app and hub firmware, use a unique account password and enable multi-factor authentication if available.
Run a reliable final check
Most pairing problems come from using the wrong button sequence, an incompatible remote or a door that is not mechanically ready. Work through these checks before buying another control or asking a technician to reset the opener.
- Record the opener model, serial number, radio family and learn-button colour before ordering a replacement.
- Confirm rolling-code and Australian radio compatibility using the model number, not appearance alone.
- Clear the door’s travel area and keep people, pets and vehicles outside the test zone.
- Use a short learn-button press on Smart Access units unless the exact manual specifies a hold sequence.
- Test closing, obstruction sensing and emergency release after every successful pairing.
- Change default keypad PINs and connected-account passwords, then install available firmware updates.
- Record the warranty details and keep an authorised local technician’s contact information nearby.
Program one remote at a time, complete a supervised opening and closing cycle, and label each control with its assigned button. Use the final checklist before testing the next device so every pairing remains secure and easy to troubleshoot.