Craftsman Garage Door Opener Force Adjustment Instructions
Craftsman garage door opener force adjustment instructions help correct a door that stops before closing, reverses unexpectedly, or struggles to lift. The force setting controls how much power the motor applies while opening and closing, but it should never be used to overcome a damaged spring, seized roller, or poorly balanced door.
Australian homeowners should check the exact model before touching the controls. Craftsman-branded openers are less common in Australia than Merlin, ATA, B&D, and other locally distributed systems, and imported units may use different voltage, manuals, or control layouts. The safest approach is to identify the opener, inspect the door, and make only small adjustments.
Identify The Opener And Controls
Start by standing inside the garage and looking at the motor housing. Older Craftsman chain-drive and belt-drive units commonly have two adjustment screws or dials marked “UP FORCE” and “DOWN FORCE”. These may sit beneath a light cover or beside the travel adjustment controls. Some models use force settings that are adjusted with buttons and a digital display instead.
Do not confuse force adjustment with travel adjustment. Travel determines where the door stops at the fully open and closed positions. Force determines how much resistance the opener tolerates during movement. Changing travel when the real problem is excessive friction can make the door stop in the wrong position or place unnecessary stress on the mechanism.
Write down the original settings or take a clear photograph before making changes. If the label is missing, locate the model number on the motor cover and use the matching manual. Resources such as local garage guidance can also help homeowners understand common opener layouts before arranging a service visit.
Prepare The Door Safely
Close the door fully and remove people, pets, bicycles, and stored items from its path. Unplug the opener before inspecting the tracks, rollers, hinges, brackets, and lifting cables. Avoid placing fingers near hinges or between track sections, where a moving door can cause serious injury.
With the opener disconnected, use the emergency release handle to separate the trolley from the door. Lift the door manually to about halfway and let go carefully. A properly balanced door should remain close to that position. If it drops quickly, rises by itself, feels unusually heavy, or binds at one point, stop adjusting the motor force.
Garage door springs store substantial energy and should not be tightened, removed, or repositioned by a homeowner. In Australia, a local technician should assess spring systems, particularly on wide sectional doors common in Sydney, Melbourne, and Brisbane homes. Heat, dust, coastal salt, and accumulated grit can also increase resistance over time.
Adjust The Force In Small Steps
Reconnect power only after the inspection is complete. If your Craftsman opener has separate force screws, turn the appropriate control by a very small amount, usually no more than one eighth of a turn. Follow the direction markings on the housing because clockwise and anticlockwise effects can vary between models.
If the door stops while opening, the up-force setting may be too low, but the same symptom can result from a weak spring, dry rollers, a bent track, or an obstruction. If the door starts down and reverses, the down-force setting may be too low, although incorrect travel limits or a dirty safety sensor can create a similar result.
Make one adjustment at a time and run one complete cycle after each change. Never turn both controls substantially in the same direction to make the opener “stronger”. Excessive force can prevent the safety reversal system from working correctly and may damage the door, opener gears, or mounting points.
Some later Craftsman units learn operating force electronically. These models may require a travel programming sequence rather than a simple screwdriver adjustment. Use the model-specific procedure, and do not substitute instructions from a visually similar opener.
Test The Safety Reversal System
After a minor adjustment, open and close the door while watching and listening from a safe position. The door should move smoothly, without shuddering, grinding, hesitation, or a sudden change in speed. It should stop at the programmed limits without pressing hard against the floor or header.
Test the photo-eye sensors by checking that their lenses are clean, aligned, and firmly mounted. The indicator lights should show normal operation according to the manual. Place the approved test object in the door’s path only as specified by Craftsman; many North American manuals describe a flat object on the floor, while local requirements and model instructions may differ.
The door should reverse promptly when the safety system detects an obstruction. If it continues downward, closes with excessive pressure, or fails to reverse, disconnect the opener and keep the door out of service. A force adjustment is not a substitute for repairing the safety circuit.
Recognise When Force Is Not The Problem
A door that works when empty but struggles with the opener often has a mechanical issue. Check for loose hinges, damaged rollers, track dents, cable problems, and debris in the tracks. Do not lubricate tracks with grease, because it can collect dust and make the rollers bind. Use only a lubricant recommended for the rollers, hinges, and spring assembly.
A door that reverses near the floor may have an incorrect close-travel setting, a sensor interruption, or a floor that has shifted. A door that reverses near the top may be meeting resistance from a tight seal, a distorted track, or an opener travel limit set too far. Note exactly where the problem occurs before changing any setting.
For a local assessment, a qualified repair specialist can test door balance, spring condition, opener current, and safety reversal performance. This is particularly useful for older imported Craftsman units where replacement parts, remotes, and compatible control boards may not be readily stocked by Australian retailers.
Follow A Controlled Adjustment Routine
A disciplined process reduces the chance of making a small fault worse. Keep the remote control away from children, avoid standing under the door, and never test by placing a hand, foot, or body under the moving panel.
Use these practical recommendations:
- Confirm the model number and download the correct Craftsman manual.
- Inspect balance, springs, tracks, rollers, hinges, and cables before changing force.
- Mark the original force positions and adjust only one control at a time.
- Make changes in very small increments, then run a complete cycle.
- Check photo-eye alignment and test automatic reversal after every adjustment.
- Stop immediately if the opener becomes noisy, overheats, or strains.
- Arrange professional service for springs, cables, structural damage, or failed safety tests.
Australian owners should also consider the local replacement market. A Craftsman opener imported privately may operate differently from products sold through Australian garage-door dealers. Remote frequencies, wall controls, spare circuit boards, and compliance documentation may be harder to source, making a qualified inspection more practical than repeated force adjustments.
Compare Symptoms With The Right Response
The symptom is often more useful than the adjustment screw itself. A door that stops at the same point every time may have a travel-limit issue, while a door that behaves differently in hot and cold weather may be affected by seals, lubrication, or material movement. Changes in humidity can also affect timber doors and older weather seals.
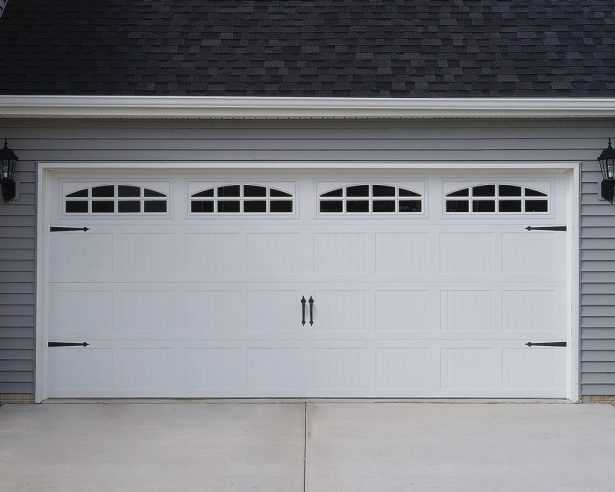
Design and door weight matter as well. Wide insulated sectional doors, older timber doors, and custom carriage-style designs place different demands on an opener. Homeowners considering a replacement can review garage door styles before choosing a door and motor as a matched system rather than treating the opener as a universal fit.
| Symptom | Possible cause | Appropriate first response | When to call a professional |
|---|---|---|---|
| Door stops while opening | Low up-force, weak spring, binding roller, damaged track | Inspect balance and obstruction; make only a minor model-approved adjustment | Door is heavy, uneven, or still strains |
| Door reverses while closing | Low down-force, incorrect travel, sensor issue, floor resistance | Clean and align sensors; check the close limit | Reversal continues after basic checks |
| Door closes too hard | Excessive down-force or incorrect travel | Reduce force slightly and retest safety reversal | Door damages the seal or will not reverse |
| Motor runs but door barely moves | Disengaged trolley, broken drive gear, spring failure | Check trolley engagement without touching springs | Gear, spring, cable, or shaft fault is suspected |
| Problem changes with weather | Seal friction, corrosion, swelling, lubrication issue | Inspect seals and moving parts | Corrosion, structural movement, or persistent binding appears |
| Opener works from wall button but not remote | Remote battery, programming, receiver fault | Replace battery and reprogram according to the manual | Several remotes fail or receiver components are damaged |
A force setting should leave the opener strong enough to complete a normal cycle while still allowing the safety system to detect resistance. If the setting must be increased repeatedly, the underlying door problem is likely getting worse.
Correct force adjustment can restore smooth operation, but it cannot repair a broken spring, damaged cable, warped panel, failed sensor, or worn drive gear. Keep the opener disconnected if the door is unsafe, and contact a qualified Australian garage-door technician for diagnosis and repair before returning it to automatic service.