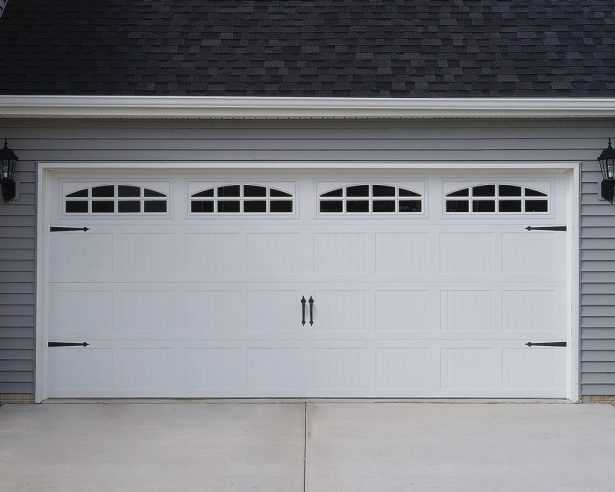
How to paint a fiberglass garage door for a fresh look
Learning how to paint a fiberglass garage door for a fresh look can make an ageing exterior look sharp again without the cost of a complete replacement. Fiberglass panels are light and manageable, but their factory finish needs careful preparation so the new colour grips evenly. The biggest improvement usually comes from cleaning and sanding thoroughly, sealing exposed areas and applying thin, even coats rather than one heavy coat.
Australian weather makes product selection and drying time especially important. Strong sunlight, humid summers, coastal salt and sudden storms can test a finish that looks excellent on the day it is applied. Many Aussie homeowners want to freshen up a garage rather than rebuild it, and a well-prepared door can make a suburban driveway, laneway or workshop feel far better. Choose a mild, dry weekend, check the paint can’s temperature limits and leave extra time for thicker coats to cure.
Check the door and select the right paint
Start by checking whether the door is actually a fiberglass or composite panel and what finish the manufacturer used. Paint adhesion can vary on gel-coated, moulded or previously painted surfaces, so look for the door’s technical information and warranty conditions. Run your hand over the panels and inspect the lower edges, raised sections and areas beneath handles. Deep cracks, soft spots, lifting skin or widespread peeling may indicate damage that painting will not solve; replacing those panels may be more economical in the long run.
Choose a water-based exterior acrylic enamel or another premium coating explicitly approved for fiberglass garage doors. “Exterior” alone is not enough if the manufacturer warns against it, and some factory colours need a compatible primer when changing from a dark shade to a pale one. A satin or semi-gloss finish gives a crisp, modern appearance and is easier to wipe clean than a flat surface, although the smoothness of the original panel still affects the result. Test the colour on a small, inconspicuous section and let it dry fully before committing to the whole door.
Local conditions should shape that choice. Sydney’s salty coastal air, Melbourne’s famously changeable weather, Perth’s intense sun and Brisbane’s humidity each place a different demand on an outdoor coating. Dulux, Cabot’s and similar exterior products are readily available at Australian hardware stores such as Bunnings and Mitre 10, so compare the stated coverage, ultraviolet resistance and compatibility with fiberglass rather than choosing solely by price. Check the tint under morning, midday and late-afternoon light, as the same colour can shift noticeably on a large door.
Clean, repair and sand the surface
Wash the door with warm water and a mild household detergent, using a soft cloth or non-abrasive sponge to remove dust, pollen, cobwebs, oil and bird mess. Work from the top down and rinse with clean water. A garden hose on low pressure is useful, but keep the jet away from window seals, weatherstripping and repairs; a pressure washer can force water behind trim or drive loose particles into scratches. Let every panel dry completely before moving on.
Scrape only loose or flaking paint with a plastic scraper, then scuff the remaining glossy finish lightly with 180- to 220-grit sandpaper. Feather the edges of bare patches and avoid sanding deeply into the fiberglass. Wipe away dust with a damp cloth followed by a clean tack cloth, and allow the surface to become completely dry. Mask off or protect anything that sanding dust could reach, wear eye protection and a suitable respirator, and avoid working where wind can carry dust back onto the panel.
Small chips and cracks can often be repaired with a filler made for composite or automotive bodywork. Apply it only to the damaged area, let it harden according to the instructions, sand it flush and remove the dust. Larger splits, failed panel joints or delamination call for a specialist assessment rather than a heavier coat of paint. Keeping the repair shallow and tidy matters, because the new finish can magnify rough patches when viewed from the driveway.
Mask carefully and establish the colour base
Mask windows, handles, decorative trim and the bottom seal before opening the paint. Use high-quality exterior painter’s tape, press the edges down firmly and lay plastic sheets over nearby walls, floors and vehicles. Cover the door tracks and rollers without blocking their movement, and keep tape away from moving parts. Measure the trim in millimetres, as Australian garage-door suppliers commonly do, so you buy enough tape without creating bulky ridges that show through the finish.
Prime any bare fiberglass, filled areas and spots where the old coating has been removed. Choose a bonding primer compatible with both the door and the topcoat, and follow the application and curing times on the primer can. A spot primer is enough for isolated repairs; a full primer coat may be suitable when the manufacturer calls for one or when changing to a substantially lighter colour. Brush primer into recessed corners, allow it to level, and do not start the colour coat until the surface is uniformly dry and not tacky.
Cut in around raised panels, edges and windows with a quality brush, then roll the broad areas using a short-nap foam roller suitable for a smooth finish. Keep a wet edge as you work and lay off excess paint to prevent lap marks. Mix the paint regularly, as settled pigment can create a patchy finish, and follow the can’s spread rate rather than trying to hide the surface in one layer. Plan on two quality topcoats, and add a third only when the first coats do not provide even coverage. Keep windows closed and ventilation steady while the coating cures.
Apply the finish for long-term protection
Allow each topcoat to reach the manufacturer’s touch and recoat times before adding the next. Humid weather and cool temperatures extend drying, so test a small area rather than judging the surface by touch alone. When the second coat has lost its sheen but has not cured completely, remove masking tape carefully at a 45-degree angle. Paint that has become rubbery will pull away from the edge, while waiting too long can leave a hard ridge, so check a hidden section first.
Do the final work when the forecast offers several dry days. Avoid direct afternoon sun, strong wind, rain, dew and temperatures below the product limit. A dry, breezy morning in a coastal Sydney suburb may be better than a hot afternoon, whereas a Brisbane or Perth summer day can dry the surface too quickly for brush marks to level. Keep the garage door closed once the paint is firm enough, and check that the bottom edge, hardware and panels do not rub against the frame.
Moving the door can scratch a finish that seems dry but has not hardened, so test it gently and allow the full cure period before normal use. Disconnect the opener only if the manufacturer’s instructions require it, and secure the door in a stable position before working near the tracks. If the opener loses its settings while power is disconnected, use the Chamberlain opener programming guide before restoring operation, then test the safety beam with the door open. Never paint sensors, hinges or other moving parts.
Finish the project and protect the result
Allow the full cure period stated on the paint can before washing or parking close to the door. A weekend for preparation and painting may become several weeks before the coating is ready for heavy contact, particularly in humid weather. Keep the end of a roller tray covered so the paint remains usable, and take care to close tins tightly. If the panels are badly weathered, extensive repairs are needed or the curve of the door makes rolling difficult, obtain a quote from a qualified garage-door painter rather than rushing the final coat. Homeowners comparing local quotes can browse the local repair directory and confirm that a provider covers their area and handles the specific repair or repainting work involved.
Once cured, wipe the panels with mild soapy water every few months and rinse gently. Inspect the lower edge for chips, pooled water or seal failures, and touch up damage while it is still small. Avoid abrasive cleaners, solvent-based products and close-range pressure washing, which can dull the coating or attack rubber seals. Keeping the door’s moving parts lubricated and the weatherstripping in good condition protects more than the appearance of the paint alone.
Choose the colour, photograph the door before you start and set aside a dry weekend for the job: test one inconspicuous panel, gather the supplies and begin the clean, careful prep that will leave your fiberglass garage door looking freshly finished for seasons to come.