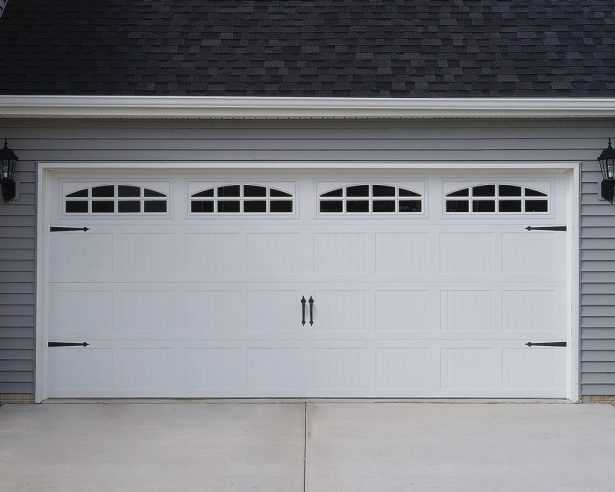
How to Replace a Garage Door Panel Safely
Garage doors rarely fail because the entire unit has aged. A dented steel section, split timber board or cracked roller slat may be replaceable once the door has been isolated and supported. Sectional doors use hinged rigid panels, while roller doors use curved slats running through circular tracks. The replacement method depends on the door’s profile, track system, panel weight and attachment to the opener. Always follow the manufacturer’s layout and leave unfamiliar spring hardware to a qualified technician.
Before buying a part, confirm that the damage is limited to a door section rather than the frame, rollers, hinges or operator rail. The job is safer with two people handling a full-size insulated panel and clear floor space. Never rely on the opener to support the door. If the supplied instructions conflict with the hardware in front of you, obtain advice before dismantling anything.
Identify the Door System and Replacement Panel
Begin by identifying the door system. A sectional door has rigid sections connected by hinges, running on horizontal or vertical tracks. A roller door has flexible or rigid slats, drum cables and a spring shaft. Single-layer steel, insulated sandwich panels, timber boards and modern composite sections all require different handling methods, even when they occupy the same opening.
Take measurements in millimetres, the usual unit in the Australian market. Record the opening width and height, section width and height, number of sections, panel thickness and hinge or roller positions. Do not rely solely on the nominal opening size printed on a suburban property in Sydney, Melbourne or another capital. Check whether replacement hardware is left- or right-hand and measure the actual gap between guides.
Match the replacement section’s profile, groove or rib pattern, finish and weight class. An insulated panel needs a compatible edge seal and foil facing, while a roller slat must have the correct crown and profile. Coastal salt around Sydney and Perth, summer heat in Brisbane and frost in Canberra can make seals and finishes important selection points.
Review the opener manual, the current relevant parts of AS 1907 and any state or territory electrical requirements if fixed wiring may be touched. Australian Consumer Law guarantees may apply when a business supplies the panel or fitting service, so keep the invoice and written compatibility statement. A record made during scheduled door checks can also reveal whether the damage is isolated or spreading.
Tools, Safety Gear and Parts
Set up a clean, level workspace and photograph each hinge, roller and bracket before removal. Gather suitable protection and support equipment:
- Safety glasses and cut-resistant work gloves
- Cordless drill or driver with a magnetic bit tray
- Socket set, adjustable wrench and matching screwdrivers
- Tape measure, spirit level and pencil
- Stable step ladder with purpose-built panel supports or sawhorses
Select replacement components only after confirming the section dimensions and attachment system:
- The exact replacement panel or set of roller slats
- Compatible hinges, rollers, end brackets and fasteners
- A replacement astragal or brush-type bottom seal
- The correct wind strut or retaining clip
- Lubricant and cleaner approved for the door material
- The installation manual, spare-parts record and sales invoice
Do not substitute ordinary screws for the specified fasteners or alter track brackets to make a mismatched panel fit. Keep small hardware in labelled containers, and check that replacement parts remain available from the original or a compatible Australian supplier.
Remove the Damaged Door Section
Close the door, switch off its power supply and disconnect the opener according to its manual. Operate the emergency release only after the opener has been removed from the operating path. Support the door at manufacturer-approved points so it cannot descend when hinges, brackets or slats are loosened. A torsion spring stores enough energy to cause severe injury, even with the motor unplugged.
For a sectional door, mark the hinge positions and remove the screws or bolts securing the damaged section. Detach its adjoining hinges, wind strut and roller brackets while another person supports the weight. Roll or lift the section clear of the guides without twisting it. If it is a lower section, stack the upper sections securely before releasing the panel; an upper section may require the stack to come down first.
A roller door needs a different sequence. Remove only the end cap, slats and retaining hardware specified by the manufacturer, usually from the side opposite the drum when access allows. Never loosen the spring shaft, cable drum or tension bracket to remove a slat. Once the damaged piece is free, inspect guides, rollers and nearby slats for misalignment, heat marks or sharp edges that could damage the replacement.
Fit the New Panel and Check Alignment
For a sectional door, position the replacement section where the original one was located. Fit or transfer the hinge and roller brackets according to the manual, keeping roller wheels centred in their guides. Connect adjoining sections with correctly positioned hinges, press the interlocking seals together and reinstall the wind strut. Use existing holes where possible, and never force a bracket against the panel skin to compensate for a dimensional error.
For a roller door, slide the new slat or slats in from the accessible side. Confirm that raised or recessed faces face the correct way and that each slat nests fully with its neighbours. Refit the bottom profile, bottom retaining brackets and end cap without contacting the spring assembly. On an older or unbranded door, compare the dimensions and bracket style with another reliable garage door advice source before modifying a track.
With the opener still disconnected, move the door manually through several complete cycles. Every section should remain captured in its guides, seals should sit evenly and the bottom seal should contact the floor without buckling. Correct a binding roller or hinge using the adjustment specified by the manufacturer. If the new panel is heavier than the original, stop before changing springs or lift capacity; the original design may require different hardware.
Return the Door to Safe Service
Restore power only after the door moves smoothly by hand. Set the travel limits and operating force according to the opener instructions, then use the wall control to test opening, closing and emergency release. Follow the manufacturer’s obstruction-testing method, usually with a suitable timber block, while keeping hands and feet clear. Confirm that safety sensing, closing limits and any battery-backup system operate correctly.
Clean the replaced section and apply lubricant only to points specified for that door system. Inspect rollers, hinges, tracks, weather seals and the bottom edge after storms and at regular intervals. Record the part number, purchase date and warranty details. Keep cuts from sharp sheet metal away from children and dispose of the damaged section promptly.
Follow the same sequence whenever this work is needed: isolate, support, match, align and test. Maintain the completed repair on a planned inspection cycle, and engage a qualified garage-door technician before working on spring tension, cables, fixed wiring or an unfamiliar track arrangement.