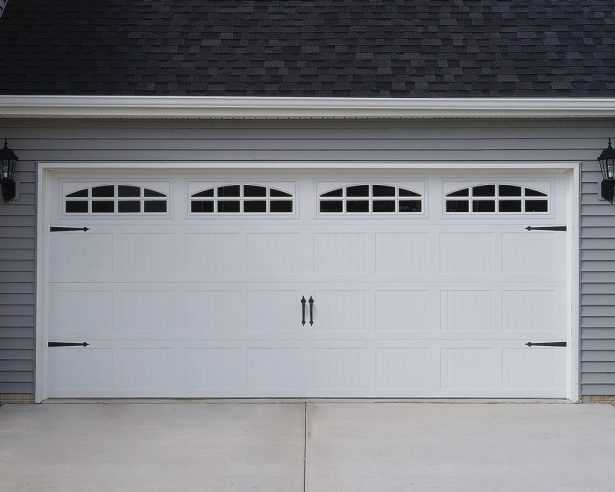
How to Replace Garage Door Weather Stripping
A worn garage door seal can leave visible gaps around the door, allowing rain, dust, insects and hot or cold air into the garage. Weather stripping also reduces rattling and helps protect stored tools, vehicles and household items from moisture. When the rubber has cracked, flattened or pulled away from its channel, replacing it is usually a practical homeowner task.
Australian garages face demanding conditions. Strong ultraviolet exposure can harden rubber, coastal salt can accelerate deterioration, and heavy rain in places such as Brisbane, Sydney and Perth can quickly reveal a poor seal. The right replacement depends on the door style, the location of the gap and the dimensions of the existing strip.
Identify The Seal That Needs Replacing
Garage door weather stripping is used in several locations. A bottom seal, sometimes called a threshold seal or astragal, attaches to the lower edge of a sectional or tilt door. It closes the gap between the door and the concrete floor. Side and top seals, often called stop moulding or perimeter seals, are fixed to the frame and press against the closed door.
Roller doors commonly use a bottom bar seal that slides into a channel beneath the curtain. Sectional doors may have a flexible U-shaped rubber seal fitted into an aluminium retainer. Some doors use a bulb seal, while others rely on a wide flap that bends against the floor. Brush seals are useful in dusty areas, though they generally provide less resistance to wind-driven rain than solid rubber.
Close the door and inspect it from inside during daylight. Look for visible light, crushed rubber, splits at the corners, gaps along the floor or sections that no longer touch the frame. A door that is difficult to close, sits unevenly or leaves a large gap at one corner may have a hinge, track or spring problem rather than a simple seal issue.
Before buying materials, take a photograph of the old profile and measure its width, height and channel shape. Garage door seals are not universally interchangeable. A seal for a B&D roller door may differ from one used on a sectional door, and local suppliers may describe the same product as bottom rubber, weather bar, door draught excluder or garage door astragal.
Prepare Safely And Choose Compatible Materials
Disconnect the automatic opener from power before working around the door. If possible, use the manual release to close the door fully, then keep children and pets away from the work area. Never loosen torsion springs, remove lift cables or dismantle counterbalance hardware to replace a seal. These components store significant energy and should be handled by a qualified garage door technician.
Gather a tape measure, utility knife, pliers, a flat screwdriver, silicone spray, mild detergent, a bucket, rags and suitable fasteners. You may also need a rubber mallet, a hacksaw for an aluminium retainer or a pair of sturdy scissors. Wear gloves because old rubber can have sharp, brittle edges, and use eye protection when cutting metal tracks.
Material selection matters in the Australian climate. EPDM rubber generally performs well outdoors because it resists sunlight, rain and temperature changes. Vinyl can be economical, but some low-grade products become stiff after prolonged exposure to intense sun. In coastal towns such as Newcastle, Adelaide and Cairns, corrosion-resistant aluminium and stainless-steel screws are sensible choices.
The door material can influence the surrounding seal and frame condition. Homeowners comparing steel, timber and aluminium doors can use this material guide to understand how construction affects maintenance, weight and weather resistance. A seal cannot compensate for rotten timber, bent panels or a severely corroded retainer.
Replacing A Bottom Garage Door Seal
Start by opening the door enough to access the lower edge while keeping it stable and disconnected from the opener. For a seal held in a track, spray a small amount of silicone lubricant into the channel. Remove end caps or retaining screws, then pull the old rubber out gradually. If it has bonded to the track, use pliers and cut it into manageable lengths rather than forcing the retainer out of alignment.
Clean the channel with warm soapy water and allow it to dry. Remove rust, dirt and hardened adhesive with a scraper. If the channel is bent, straighten it carefully with pliers, but replace a badly damaged retainer instead of trying to reshape it repeatedly. A smooth, clean channel lets the new seal slide into position without excessive stretching.
Measure the opening and cut the replacement seal slightly longer than the door width. The extra length allows for minor shrinkage and can be trimmed once the seal is installed. Feed the new rubber into the track from one end, working a short section at a time. Silicone spray can help, but avoid petroleum-based lubricants because they may attack some rubber compounds.
For a seal that fits into a U-shaped retainer, make sure the internal ribs or T-ends are fully seated along the entire length. Refit the end caps or screws, then trim the ends neatly. Close the door and inspect the contact with the floor. The rubber should touch lightly and evenly. If it folds under the door, catches on the floor or prevents the door from closing, it is too large, incorrectly positioned or incompatible with the retainer.
Fitting Side And Top Weather Seals
Perimeter seals are usually attached to the timber or metal frame rather than the moving door. With the door closed, measure the left side, right side and top separately. Old seals may have compressed unevenly, so do not assume both sides require identical lengths. Remove nails, screws or staples carefully and check the frame for rot, swelling or loose sections.
Position the replacement strip so its flexible lip overlaps the door edge without dragging heavily. For many stop mouldings, the solid mounting flange sits against the frame while the angled rubber or vinyl flap presses against the closed door. Fix the top section first, then the side sections. Overlap the corners neatly or cut them at a modest angle according to the product instructions.
Use exterior-rated screws or fasteners at intervals recommended by the manufacturer. Stainless-steel fixings are worthwhile near the coast, where salt-laden air can rust ordinary steel. Do not compress the seal so tightly that the door becomes difficult to operate. A seal should create gentle, continuous contact rather than act as a brake.
After fitting, open and close the door manually several times. Watch the upper corners and side tracks for catching. Automatic openers in Australian homes, including common Chamberlain and Merlin systems, can reverse or strain when new seals create too much resistance. Reconnect the opener only after the door moves smoothly by hand and the safety reversal system has been tested.
Troubleshoot Gaps And Maintain The New Seal
A small gap along the bottom may come from an uneven garage slab rather than a defective seal. A flexible bulb seal can follow minor variations, while a threshold strip bonded to the floor can provide a better barrier against driving rain. The threshold must not obstruct drainage or create a step that causes vehicles, prams or people to trip.
If light appears at the corners, inspect the door alignment and the side seals together. Loose hinges, worn rollers or a shifted track can move a door away from the frame. On roller doors, a curtain that has telescoped sideways may require adjustment by a specialist. Do not attempt to reposition the curtain while it is under spring tension.
Clean the seal twice a year with mild detergent and water, particularly after dust storms, nearby construction or coastal exposure. Avoid bleach, harsh solvents and abrasive brushes. A light application of silicone conditioner can help some products remain flexible, but always follow the seal manufacturer’s instructions. Keep leaves, gravel and built-up dirt away from the bottom edge.
Common signs that professional repair is appropriate include the following:
- The door is heavy, drops suddenly or will not stay open manually.
- Lift cables are frayed, loose or wound unevenly around drums.
- Torsion or extension springs appear broken, stretched or displaced.
- The track is bent, the panels are damaged or the door scrapes severely.
- A new seal still leaves major gaps after the frame and floor have been checked.
Replacement materials are available through garage door specialists, hardware retailers and Australian chains such as Bunnings and Mitre 10. Take the old profile or a clear photograph when shopping, and confirm whether the product is sold by the metre or as a complete kit. Helpful maintenance references, including practical home resources, can support routine checks, but product specifications should come from the seal or door manufacturer.
A simple inspection routine can extend the life of the new weather stripping:
- Check the bottom edge after storms and remove trapped stones or leaves.
- Look for cracking, shrinkage and flattened sections every few months.
- Test manual door movement before relying on the automatic opener.
- Inspect screws and retainers for rust, looseness or separation.
- Keep drainage paths clear so water does not pool against the garage threshold.
Replacing garage door weather stripping is often straightforward when the door hardware is sound and the correct profile is selected. Measure carefully, work with the opener disconnected, avoid spring components and test the completed installation slowly. If the door is unstable, unusually heavy or damaged beyond the seal itself, arrange an inspection with a licensed local garage door technician before continuing.