Inside a Garage Door: Understanding Each Component and Its Purpose
Most homeowners only think about their garage door when it refuses to open, but the system contains more than a dozen working parts, and recognising what each piece does makes maintenance cheaper, repairs faster, and replacements far less stressful. A door that creaks, sticks, or simply looks tired is usually telling you which component is on the way out.
This matters more in Australia than in many other markets, because salt-laden coastal breezes, bushfire-prone zones, and cyclone-rated building codes place unusual demands on residential doors. A door that suits a Fremantle beach house will not necessarily suit a Townsville cyclone region, and a home in the Adelaide Hills may need different fire performance than one in suburban Penrith.
Door panels and the materials that shape them
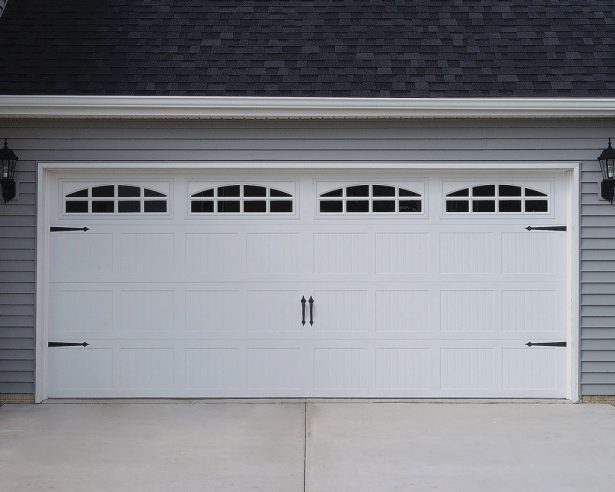
The panels form the visible face of the door and the largest thermal barrier between the garage and the outside world. In Australian suburban streets from Brisbane's western corridors to Adelaide's foothills, the most common residential choice is pre-painted steel finished in a Colorbond palette, which lets the door match a roof, fence, or façade without a separate paint job.
A second common option is timber, often meranti or western red cedar, which suits the federation cottages of inner Melbourne or the Hamptons-style builds popping up across the Sunshine Coast. Each material brings trade-offs in weight, insulation, and price. Homeowners weighing a steel versus timber choice usually balance long-term maintenance against the look they want at street level.
Panel construction varies too. Raised-panel designs mimic classic carriage-house styling, while flush panels suit contemporary architecture. Modern insulated panels sandwich a polyurethane or polystyrene core between steel skins, which keeps a detached garage in Hobart's cooler climate closer to room temperature and cuts street noise in busier neighbourhoods.
Tracks, rollers, and the hardware that guides travel
The two vertical tracks bolted to the door jambs, plus the horizontal tracks running along the ceiling, do the heavy lifting of guiding the door up and over. Tracks are typically galvanised steel, but homes within a kilometre or two of the surf in places like Sydney's Northern Beaches or Fremantle in Western Australia often benefit from upgraded stainless or zinc-rich coated tracks that resist the constant salt spray.
Rollers ride inside these tracks and are usually nylon or steel with sealed bearings. Nylon rollers run quieter, which matters for late-night arrivals in a quiet cul-de-sac, while steel rollers last longer under heavier insulated doors. Hinges connect adjacent panels so the door can bend around the curve of the track, and worn hinges are the usual culprit behind a door that looks crooked when half-open.
A few extra pieces often go unnoticed. The end bearings and centre bearing let the cable drums spin smoothly. The cable itself, usually 3mm or 4mm galvanised wire, carries the lifting force. Any fraying on the cable or rust on the drums is a sign the door needs attention before something snaps.
Springs and the counterbalance system
Torsion springs mounted on a steel shaft above the door, or extension springs stretched along the ceiling tracks, are the muscle of the whole assembly. They store enough force to lift a 100-kilogram door with one finger, which is exactly why they are also the most hazardous part for a homeowner to fiddle with.
In Australia, spring cycles are often quoted for a 10,000 to 25,000 cycle life, depending on wire size and quality. A family that opens and closes the door four times a day will wear through a light-duty spring in roughly seven years. Heavier springs stretch that out, but they also put more stress on the drums and cables, so the whole counterbalance system should be replaced as a matched set rather than one spring at a time.
A door that feels heavier than usual, slams shut instead of settling, or has visible gaps when closed is usually signalling a broken spring. Replacing these belongs with a professional, since the stored energy can launch hardware across a garage when released the wrong way.
The opener, drive rail, and carriage
The electric opener sits on the ceiling and contains a motor, a drive mechanism, and the carriage that pulls the door along the rail. Chain-drive units are the traditional workhorses and remain common in sheds across regional Queensland, while belt-drive openers use a rubber-reinforced belt for near-silent operation, which suits attached garages in suburban Melbourne where bedrooms often sit directly above.
Screw-drive openers use a threaded rod instead, and they tolerate the temperature swings in places such as Canberra, where winter mornings can sit below zero and summer afternoons push past thirty-five. Direct-drive units hide the mechanism inside the rail itself, which removes the most common wear items but costs a little more upfront.
The carriage connects to the door via a steel bar or a pair of arm brackets, and it disengages with a red emergency release cord during a power outage. Many newer units include a backup battery so the door still operates during a blackout, a feature that has become popular in outer Sydney suburbs where storm season can knock out power for hours.
Safety sensors, seals, and the smaller but vital parts
The photo-eye sensors mounted near the floor are legally required on every new opener sold in Australia, and they reverse the door the moment a child, pet, or bicycle breaks the invisible beam. If one sensor gets knocked out of alignment by a wayward basketball or a garden hose, the door refuses to close, which is the system working correctly rather than a fault.
Along the bottom, a rubber seal keeps out leaf litter, spiders, and driving rain, while perimeter weatherstripping around the jambs blocks the cross breezes that whip through a Perth suburban block in summer. For homes in a designated bushfire-prone area, seals around the door also contribute to BAL ratings by limiting ember entry into the garage, and intumescent strips can be added to expand and seal the gap under intense heat.
The springs, cables, and panels carry the load, but the small parts decide whether the door is safe and comfortable to live with day after day. Keeping these components clean and aligned is the cheapest maintenance any homeowner can do.
Warning signs a component is failing
- Door feels noticeably heavier when lifting manually or after release from the opener
- Visible daylight between panels, or daylight along the floor when the door is closed
- Grinding, popping, or scraping noises from the tracks as the door moves
- Cable fraying, surface rust on springs, or a spring that has visibly stretched
- Sensor light flashing, refusing to align, or the door reversing without an obstruction
Tasks a homeowner can safely handle
- Wiping down tracks and wiping photo-eye lenses with a soft cloth every few months
- Lubricating rollers, hinges, and springs with a silicone-based spray rather than grease
- Testing the door's auto-reverse by placing a roll of paper towels in the path
- Tightening visible bracket screws on hinges and the opener rail
- Replacing bottom rubber seals and brush strips as they crack or fall away
Sizing the replacement and getting the numbers right
When a panel is dented beyond repair or the door has simply reached the end of its life, ordering a replacement starts with accurate measurements. The opening width and height, the headroom above the door, the side room on each jamb, and the ceiling clearance all dictate which sizes and track configurations will actually fit.
Getting these measurements wrong is the single most expensive mistake in a replacement, because a custom-built door that arrives two centimetres too wide cannot be returned. A step-by-step walk-through of how to measure your existing door before ordering saves both the freight and the frustration.
Australian homes vary more than most markets, so checking local council rules matters too. Some heritage overlays in suburbs like Paddington in Sydney or North Adelaide restrict door materials or colours, while body corporate rules in newer estates can dictate which side the door opens. A quick call to the local council or the strata committee keeps the new door from clashing with neighbourhood rules.
| Component | Standard residential | Heavy-duty upgrade |
|---|---|---|
| Panels | Single-skin Colorbond steel | Insulated sandwich-panel steel |
| Springs | 10,000-cycle torsion | 25,000-cycle torsion |
| Rollers | Nylon with plain bearings | Steel with sealed bearings |
| Tracks | Galvanised steel | Stainless or zinc-rich coated |
| Seals | Bottom-only rubber | Full perimeter brush and rubber |
Knowing how each part of a garage door fits, wears, and fails gives any homeowner the confidence to call the right technician for the right job, and to budget for the components that genuinely need replacing rather than guessing. Spring work, cable swaps, and opener repairs all deserve a professional, but the basics of inspection, lubrication, and measurement sit well within reach of an attentive owner.
Browse the site's other guides for step-by-step help with programming openers, choosing between steel and timber, and sizing a replacement that will fit the first time.